Sometimes after uploading a file for NCOA processing, you will realize that your file either lacks a header row or requires custom headers on the export file. TrueNCOA has a solution for this under the "Advanced Options" that allows you to add or edit the header row in the application.
Adding a header row
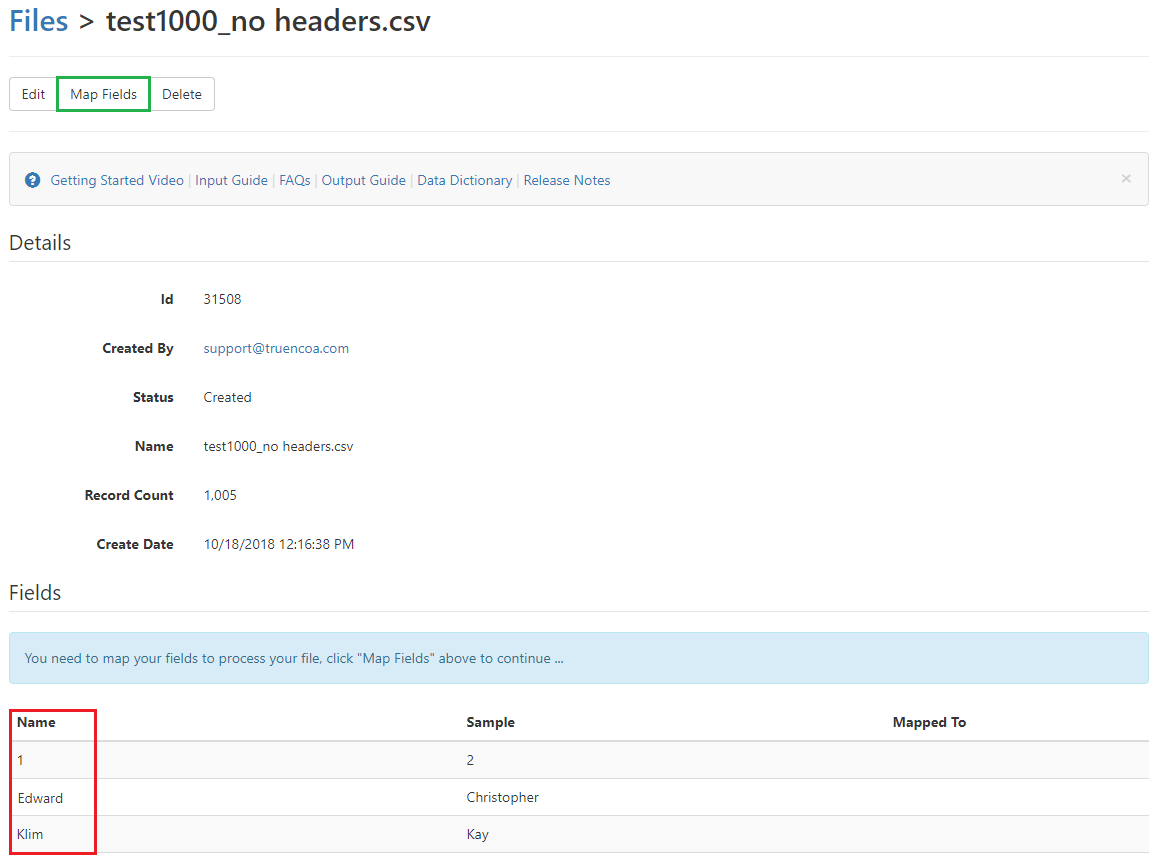
After uploading your file you will be directed to the file display with basic file information such as creation date, number of records uploaded, input fields to be mapped and a preview of the file data.
In the fields section of the example below you will see three columns:
- Name - This is the first row of the input file you just uploaded.
- Sample - This is an example of typical data for this field.
- Mapped To - These are the TrueNCOA system fields you will map your file's input fields to. This column will not be populated yet.
You'll notice in this example that the first row of the input file is data rather than header names. This is because the sample file has no header row and the 1st file row is data. To add a header row and map your fields, first click the "Map Fields" button in the top left of the page.
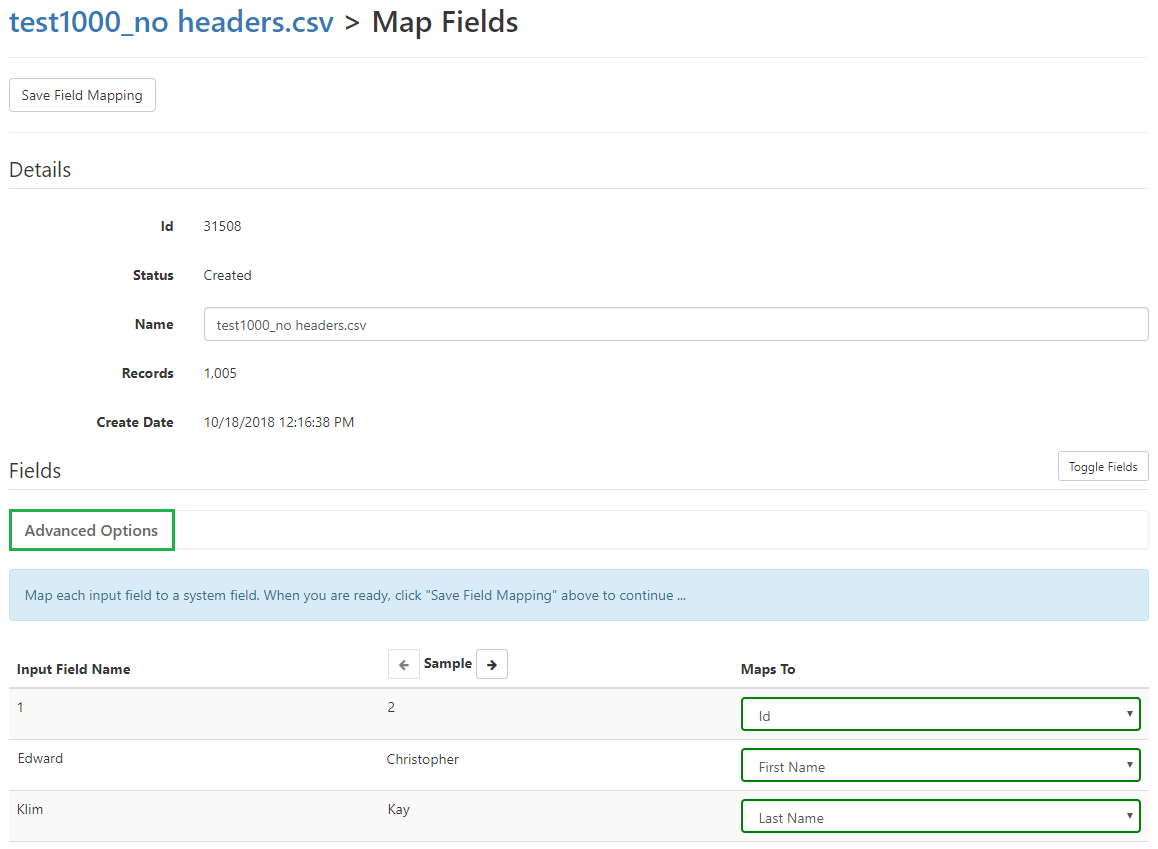
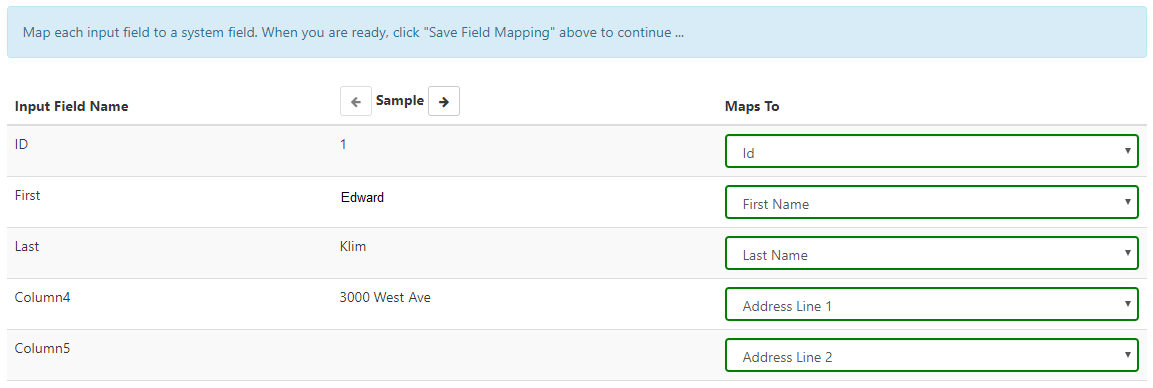
After clicking the "Map Fields" button, you will be directed to the field mapping page. You will see in the example below that the system fields are now populated under the "Maps To" column. These should automatically be set to the correct system field corresponding to your input field, but you can manually select the correct field if not.
In order to add a header row prior to saving your field mapping, click the "Advanced Options" under the "Fields" section.
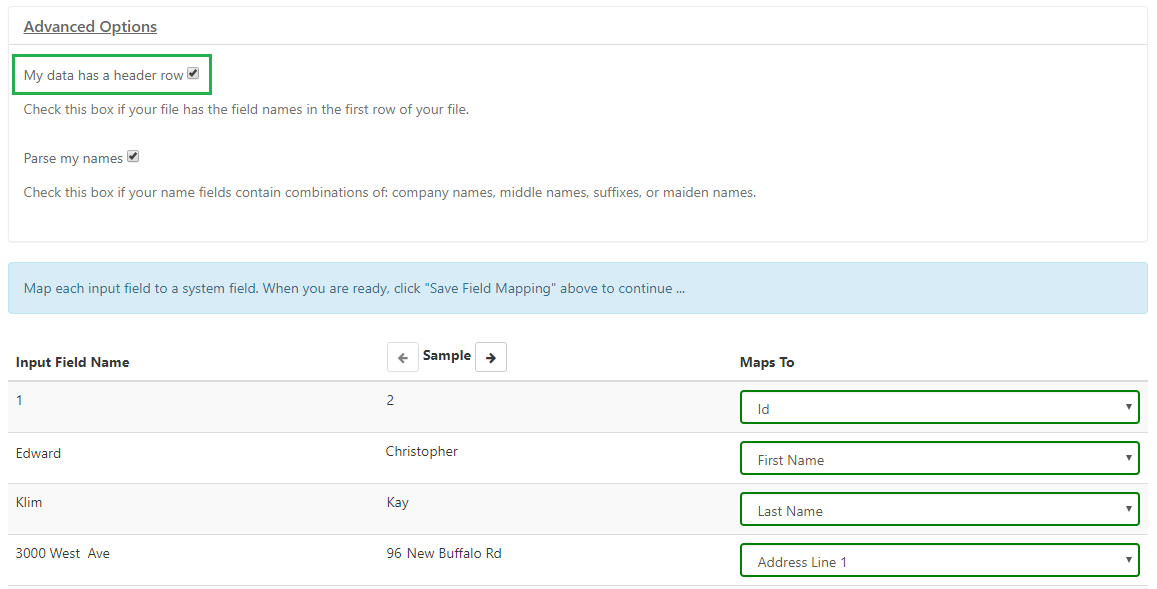
Under "Advanced Options" you will see a check box next to "My data has a header row". Uncheck this box.
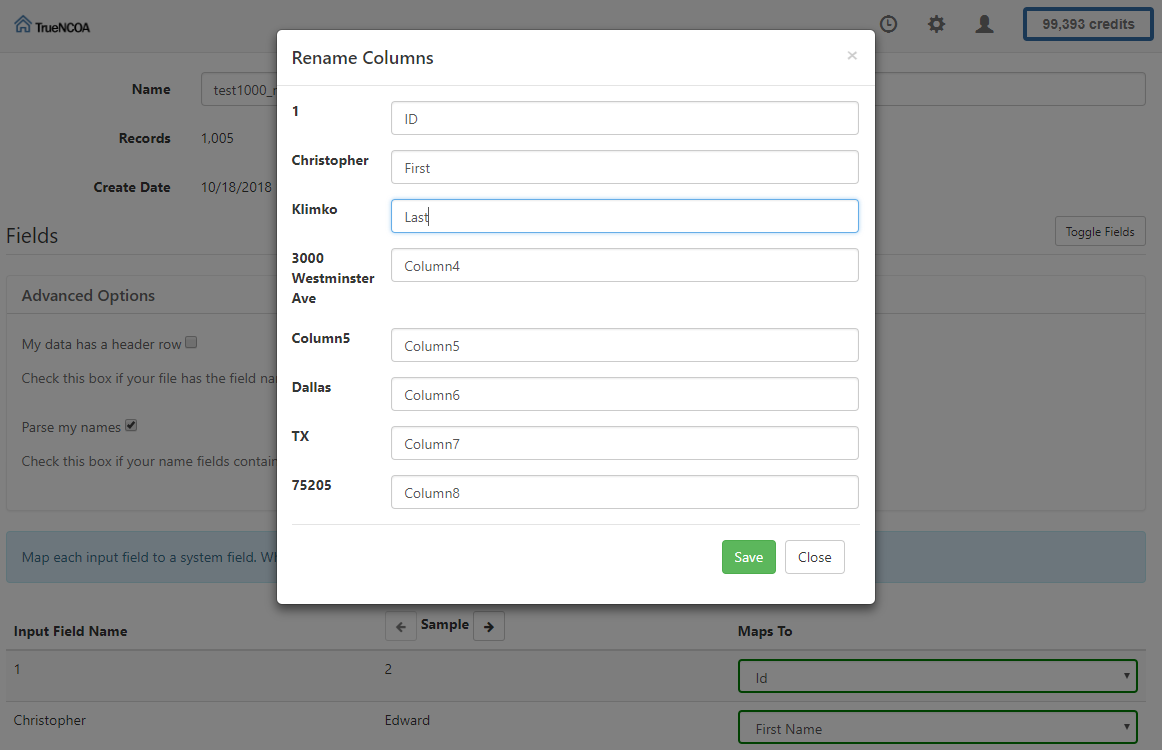
After unchecking the "My data has a header row" box, you should see the pop up window "Rename Columns". You can add your own column names here. Click save when you are done.
You should now see your added headers under the column " Input Field Name". Any headers you did not name will be named "Column#". You can now continue to map your input fields to system fields and process your file.
Editing a Header Row
You can use the same process to edit an existing header row. Simply click advanced options and uncheck the "My data has a header row" box. The "Rename Columns" box will pop up with your current headers populated. Just select and edit the headers you want change and click save.
Give us a try...
Upload, Paste, or Drag & Drop your data file today for our all-inclusive NCOA services and receive your complimentary TrueNCOA Report - no credit card required.

